


On our quest to climb all 100 famous Japanese mountains or 日本百名山 (Nihon Hyakumeizan) as they are known in Japanese, we headed to Mt. Sobo, located on the prefectural border of Miyazaki, Oita and Kumamoto on the southern island of Kyushu.
Mount Sobo translates to “grandmother mountain” in Japanese and to be honest, we really struggled to find decent information online prior to doing this hike. We hiked up Mt. Sobo from Miyazaki prefecture and we will share our experience of climbing Mt. Sobo below.
The information we share in our 100 famous Japanese mountains blog posts include the type of information we wish we could have read before doing the hikes ourselves!
Name: Mt. Sobo (祖母山)
Location: Oita Prefecture, Kyushu
Height: 1756m
Time: 4.5 Hours (2.5 hours up and 2 hours down)
Difficulty Rating: 2/5
Trail Head: Kitatani Trail Head, Miyazaki Prefecture (see map below)
Mt. Sobo can be hiked from trailheads located in Kumamoto, Oita and Miyazaki. Since we were spending a few weeks travelling around Miyazaki prefecture in our campervan, starting the hike from the kitatani trailhead in Miyazaki prefecture made the most sense for us. If attempting to use public transport, it might be better to start the hike from the Oita prefecture trailhead since there seems to be bus connections.
In the north of Miyazaki prefecture, there is a well-known town called Takachiho which is home to the stunning Takachiho gorge. It’s likely that if you are visiting Miyazaki prefecture, you will visit this spot and it’s en route to the Mt Sobo trailhead so it’s worth stopping there on the way if you have time.
We drove towards the kitatani trailhead of Mt. Sobo from Takachiho town and saw signposts on the way for “Mt. Sobo trailhead” which were in both English and Japanese. Even though we were following the navigation on google maps, seeing these signs was reassuring.
The drive from Takachiho town to the Mt. Sobo kitatani trailhead took around 30-40 minutes and we passed through a small town with traditional Japanese buildings on the way.
The closer you get to the trailhead, the windier and rougher the road gets. The road becomes a single track so be prepared to do some reversing if you meet any other vehicles.
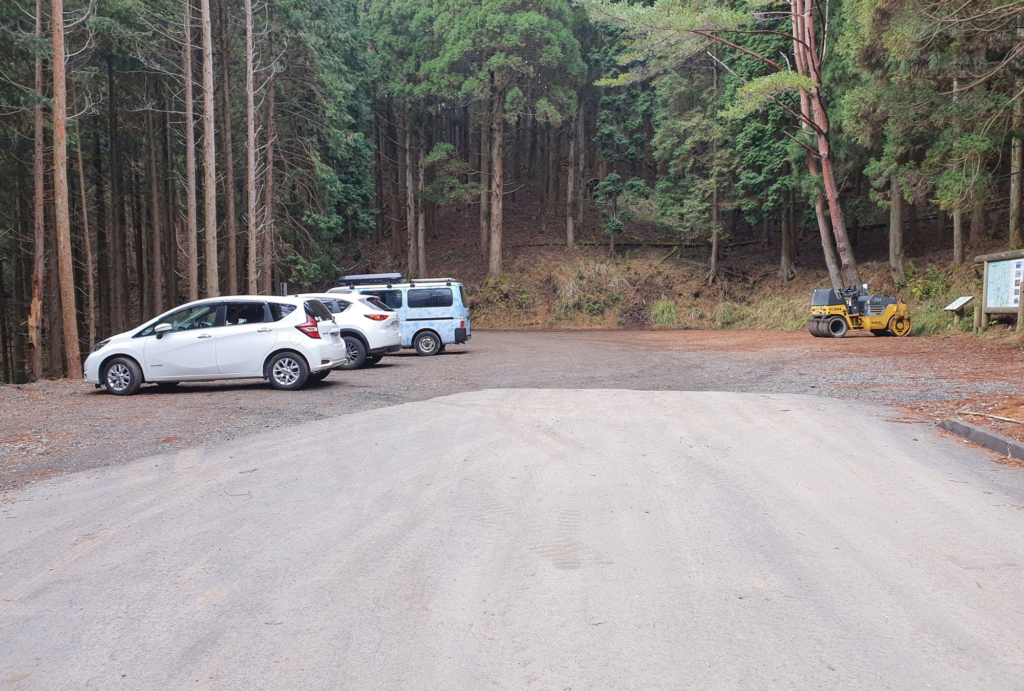
We reached a clearing with a torii gate and there were around 8 cars parked. There was also a barrier blocking any vehicles from driving further. We parked up and discovered it was possible to start the hike up Mt. Sobo from this point.
On google maps, it looks like if you can drive further on, there is a car park with toilets. However, when we did the hike in November 2020, we encountered trucks on the single track road so presumably there must have been construction going on and that’s why the road was closed. At the parking area where the torii gate is, there are no toilets.
Around 50m from the torii gate there is the starting point to the hike which is signposted in Japanese. There are 10 stations between the starting point and the top of Mt. Sobo and these are marked with wooden poles so you can keep track of how far you still have to hike.
We spoke to another hiker in the car park who said it’s possible to do a loop hike from the car park at the torii gate to the top of Mt. Sobo, but it wasn’t very clear to us which path we would need to take on the way back down so we decided to stay safe and hike up and down the same route.
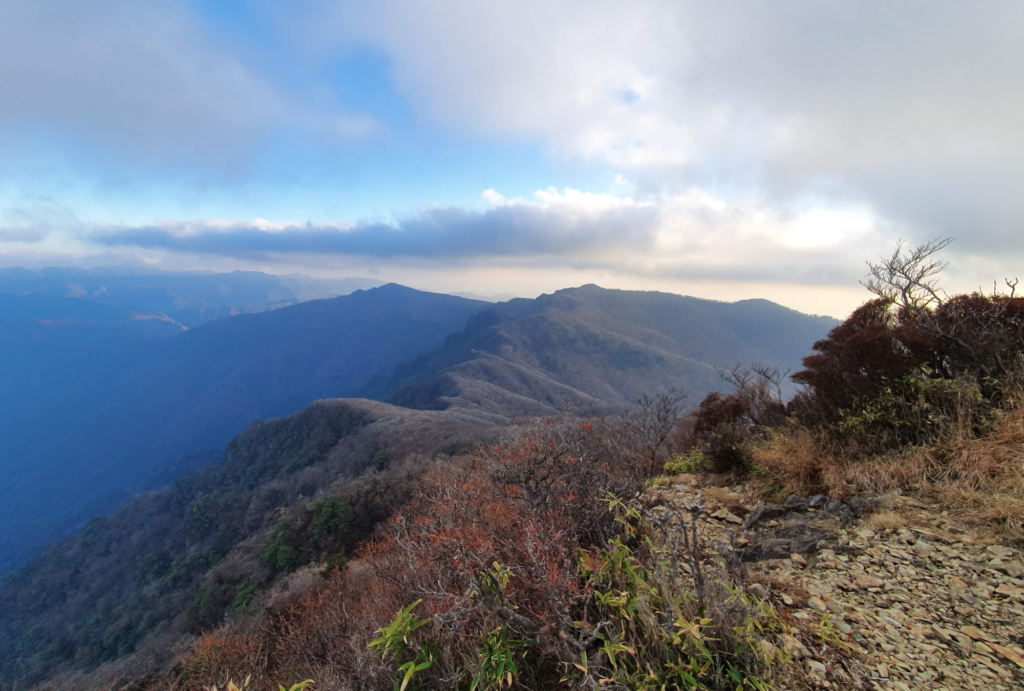
The first 60-90 minutes of the hike was very steep but the cold November breeze kept us cool. If you are doing this hike in the summer months, make sure to bring lots of water. After the initial steep section, the mountain then flattened out a bit and became much more comfortable to hike.
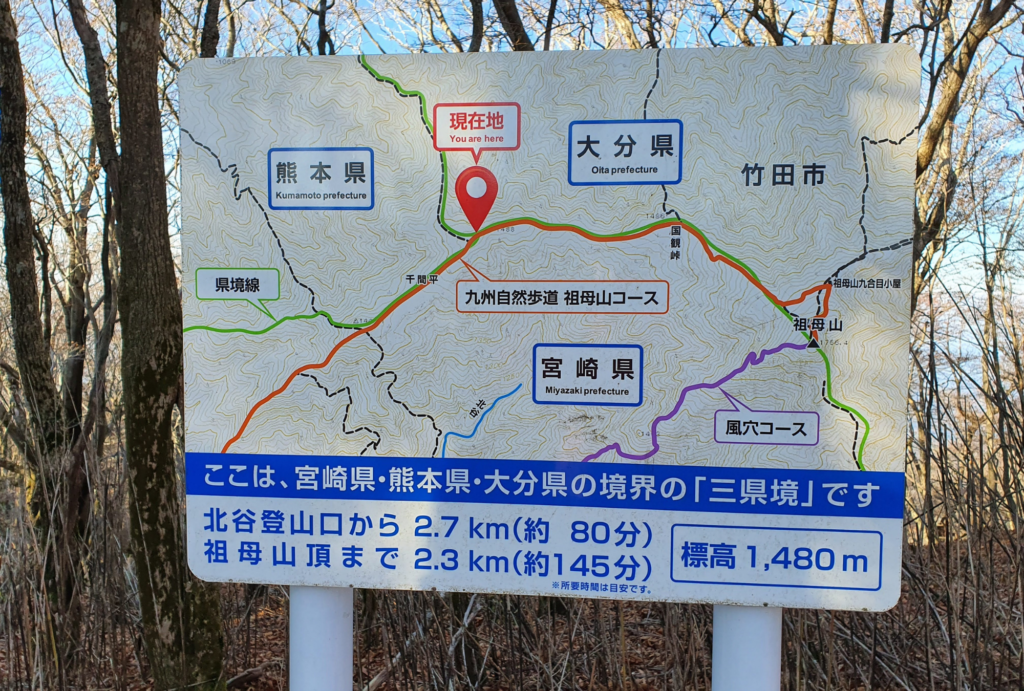
During the hike, you will pass a signpost which marks where the three prefectures meet, this is around the half-way point. The hike then meanders through a forest where there is evidence of wild pigs since a lot of the soil has been dug up. After some more time, you will reach a flat clearing where another path joins (we guessed it was the path from the trailhead on the Kumamoto side).
From here you can see the top of Mt. Sobo and this is the last 45-60 minute stretch. The hike continues through trees and you need to clamber over tree roots. You will then reach a signpost in Japanese which indicates left for the overnight hut and right for the summit. Even if you take the path towards the hut, you can continue on past the hut and meet the main hiking trail again which leads to the summit.
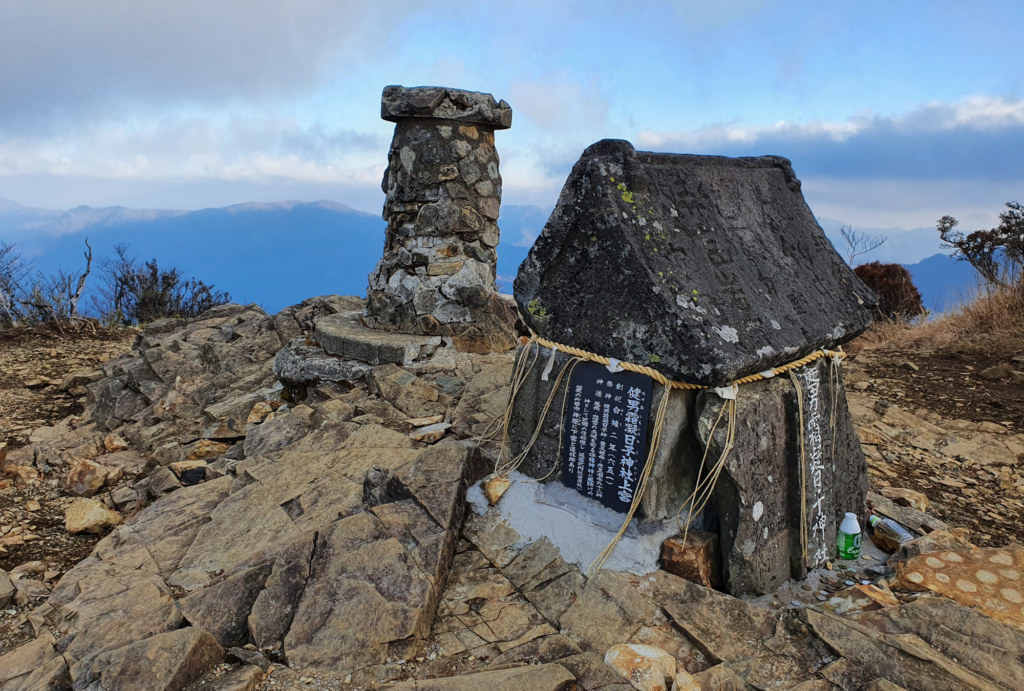
The last section of the hike before reaching the summit is quite rocky and could be slippery if it’s been raining or is icy so please take care since Shota slipped and fell on his bum!
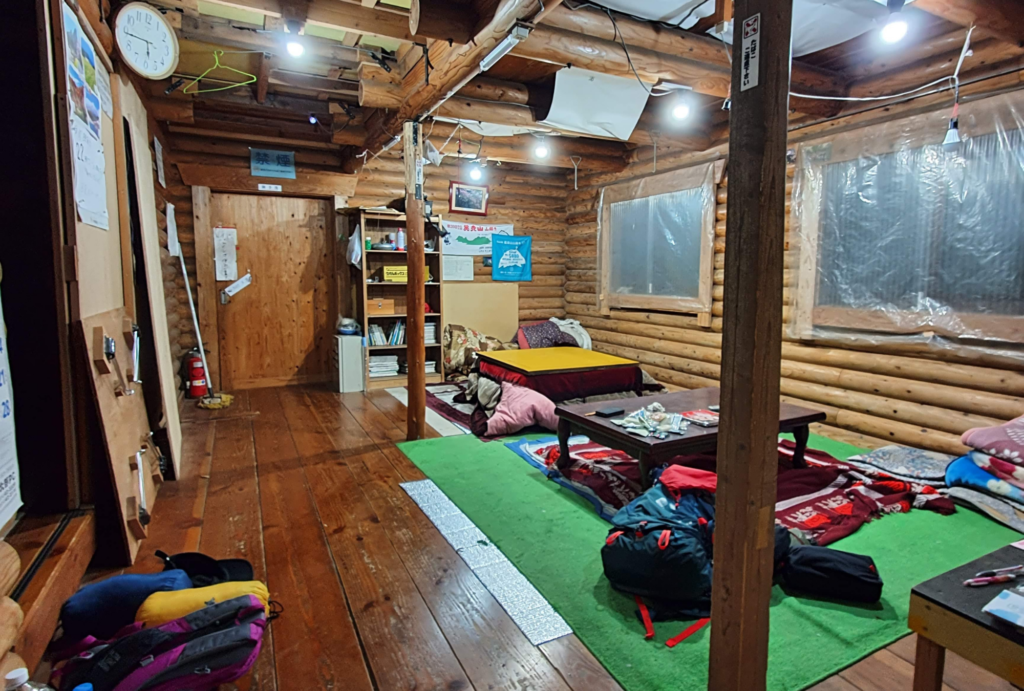
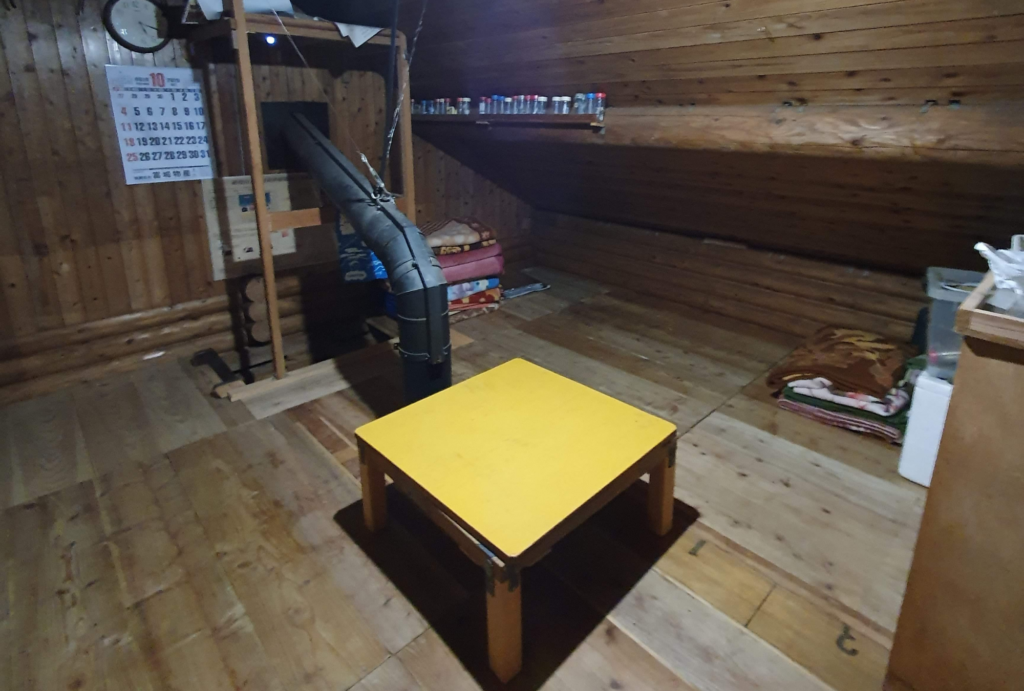
Around 10-15 minutes below the summit is a free-to-use overnight hut for hikers. We headed up Mt. Sobo in the afternoon and stayed overnight at the hut before hiking up to the summit to see the sunrise.
On the day we stayed at the hut, we had it all to ourselves. It was much better than we expected and was equipped with a log-burning stove, blankets, a toilet and CD player. There was no running water when we visited and there only appeared to be enough space outside for 1 tent.
The fire took a while to get going since a lot of the wood was damp but it did make a big difference once the hut started to warm up a bit. The bedroom located above the wood burning stove was definitely the best choice for keeping warm.
This hike exceeded our expectations and we really enjoyed our night in the hut near the top of Mt. Sobo. We were so lucky with the weather when we watched the sunrise from the summit and saw the most amazing sea of clouds while the sun was rising.
Even though we couldn’t find much information online about this hike prior to doing it, we are glad we persevered and did it anyways.